
Instructions
How To Add Custom Icons To iOS 14
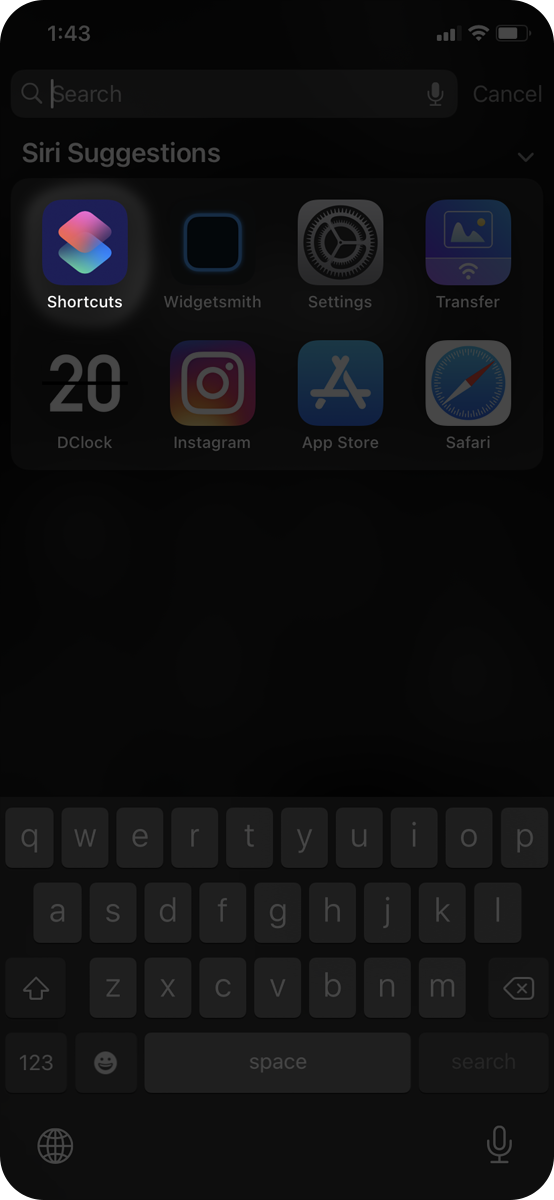
1. Open the "Shortcuts" App
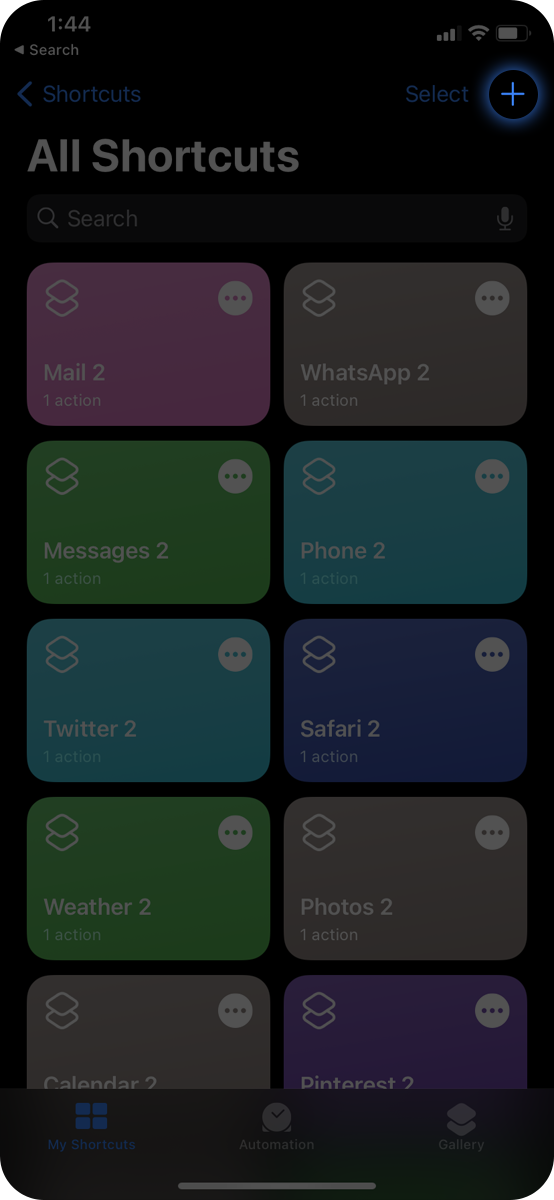
2. Tap the "+" icon in the top right corner
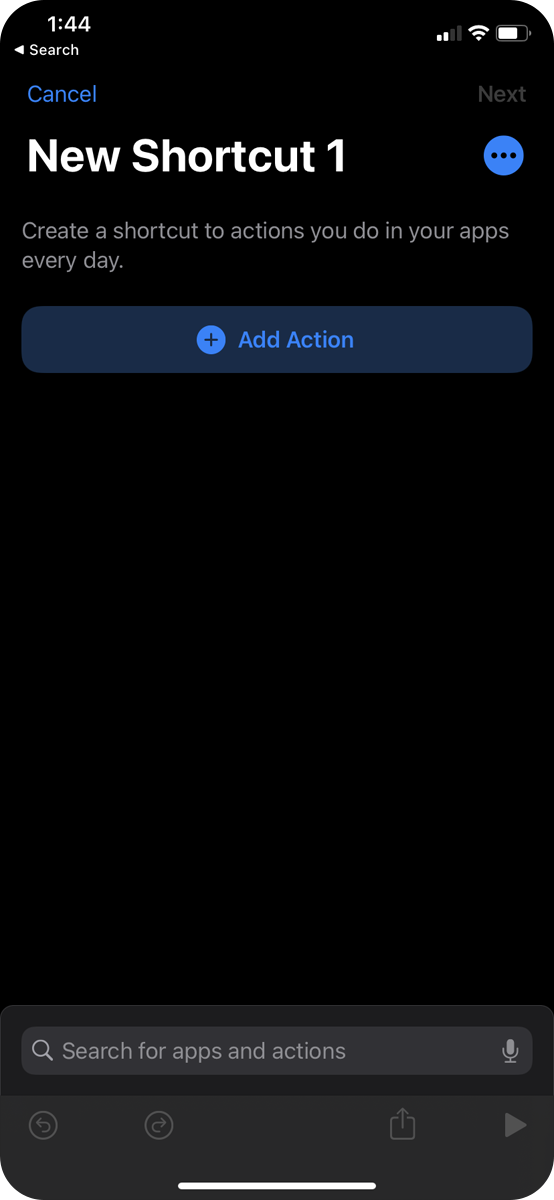
3. Tap the "+ Add Action" button
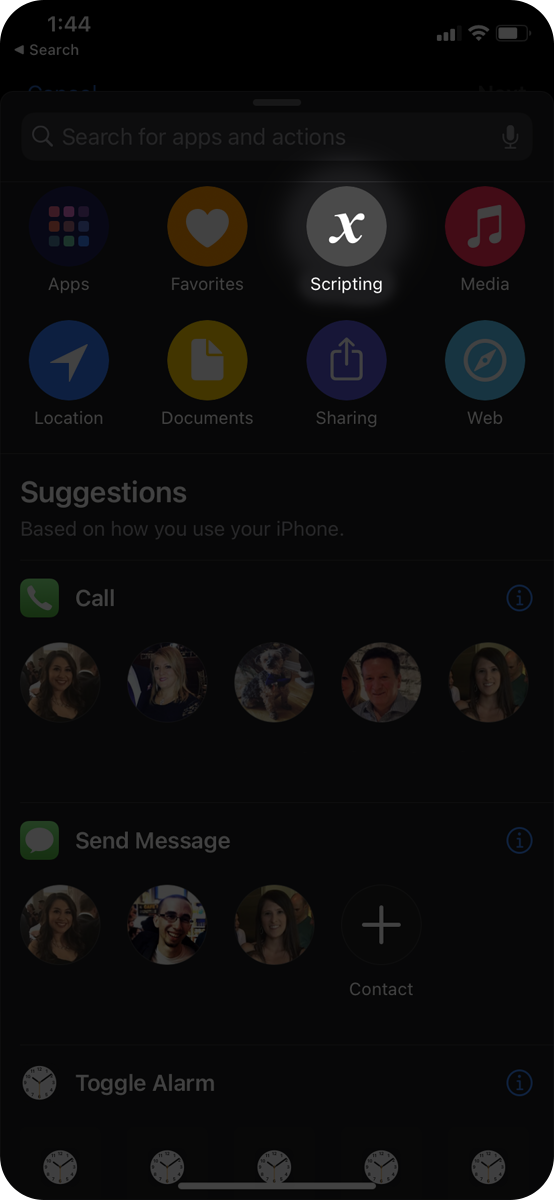
4. Tap on "Scripting"
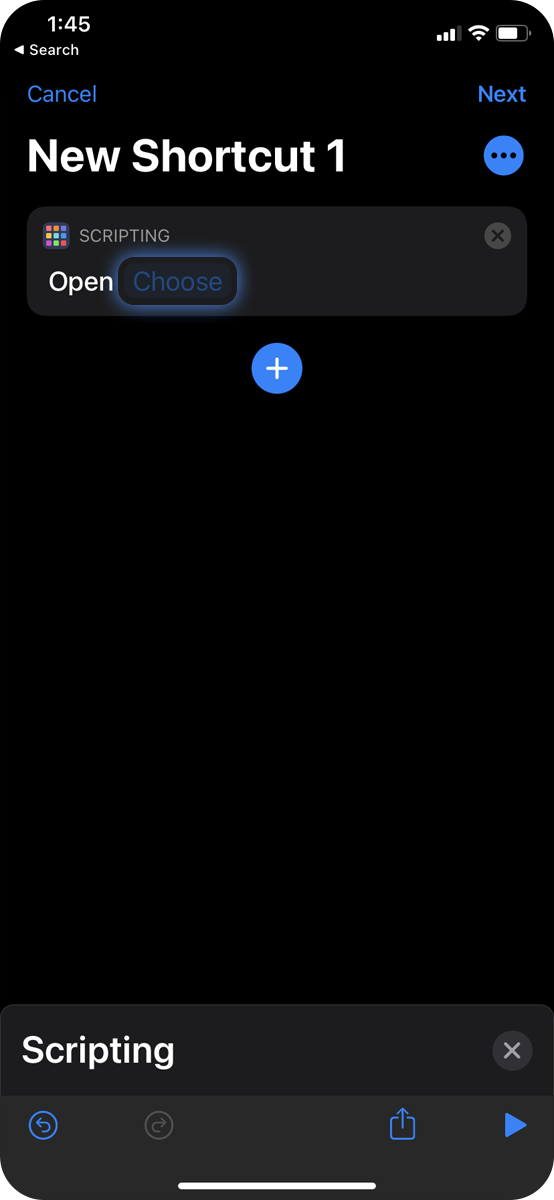
5. Tap on the "Open App" option

6. Tap on "Choose" to select the app you want to customize
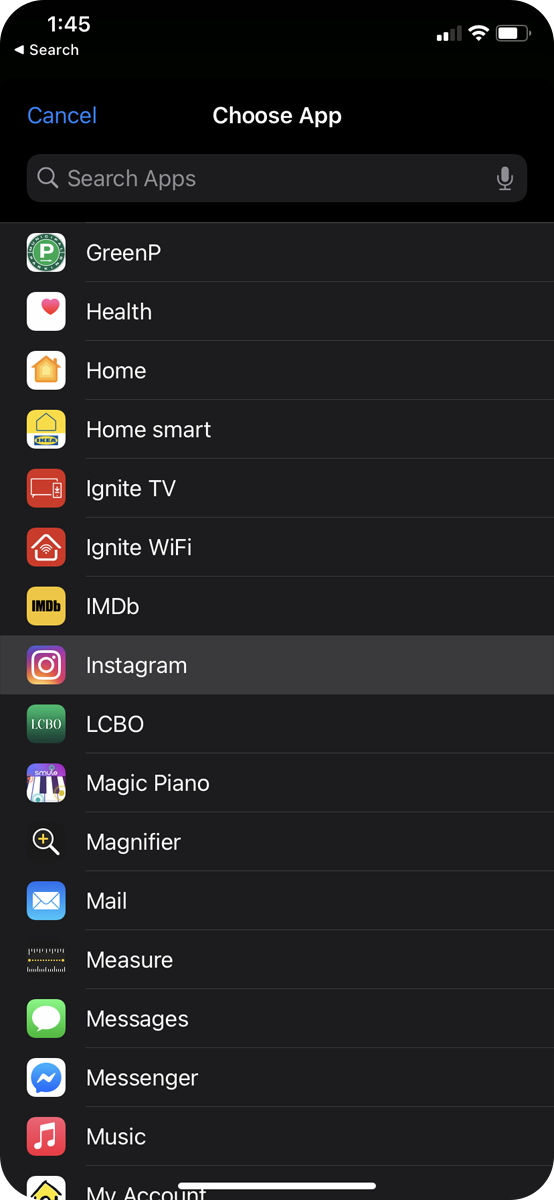
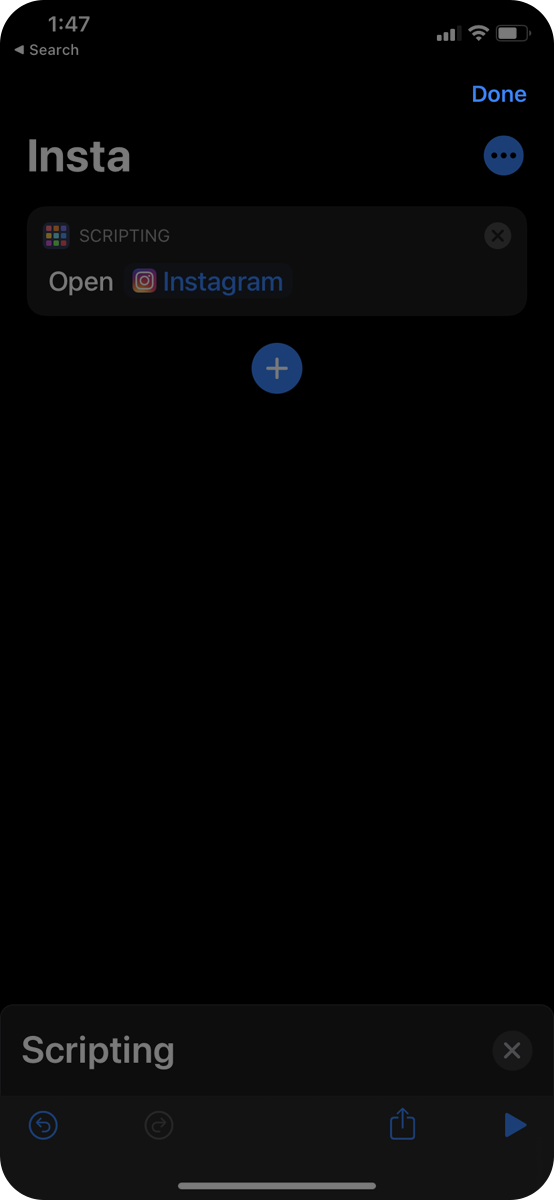
7. Tap on the name of the app you want to customize
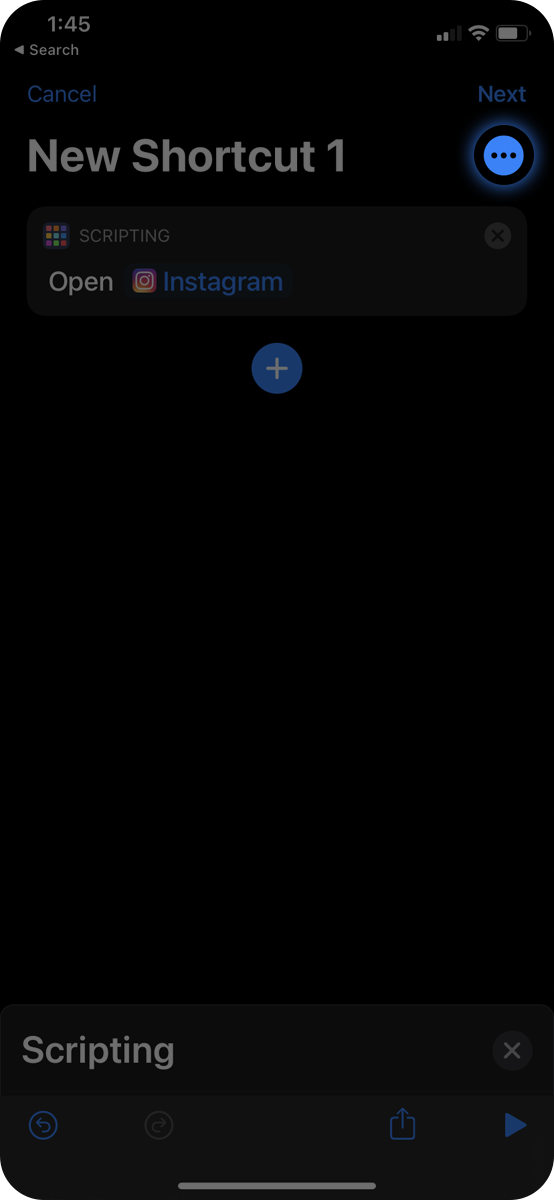
8. Tap on the ellipses "..." icon
9. Type a shortcut name (name of the app you want customized will do)

10. Tap the "Add to Home Screen" option

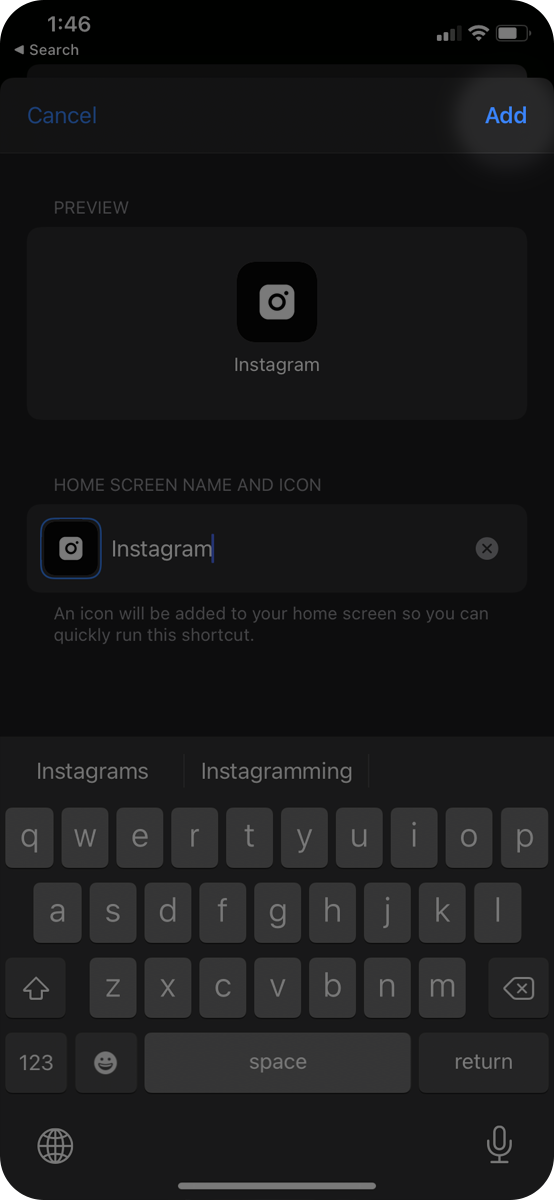
11. Type the name of the app you are customizing in the "Shortcut Name" section. This is how it will be displayed on your home screen
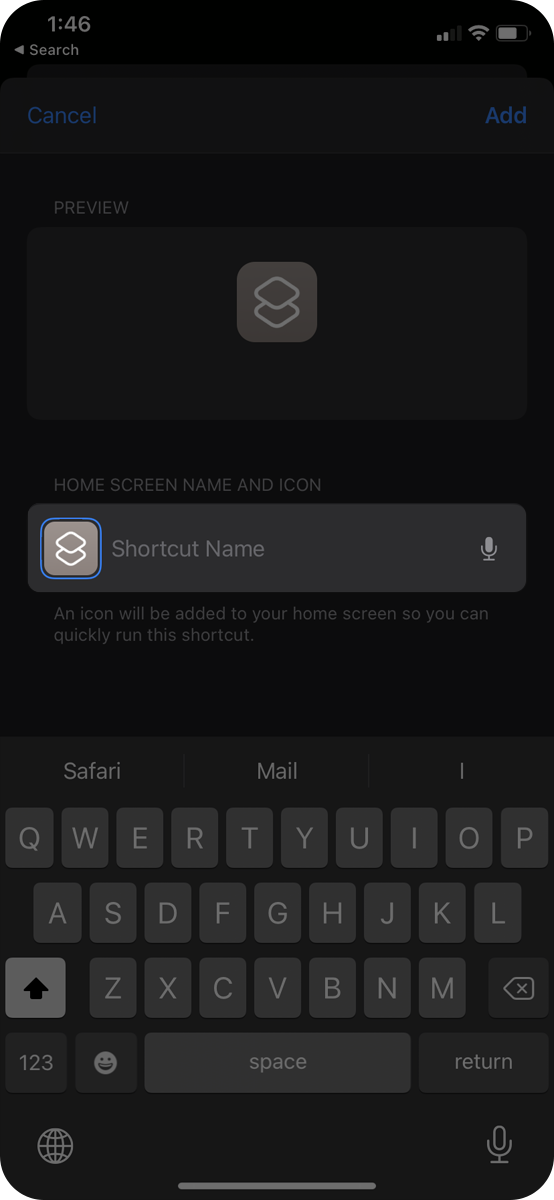
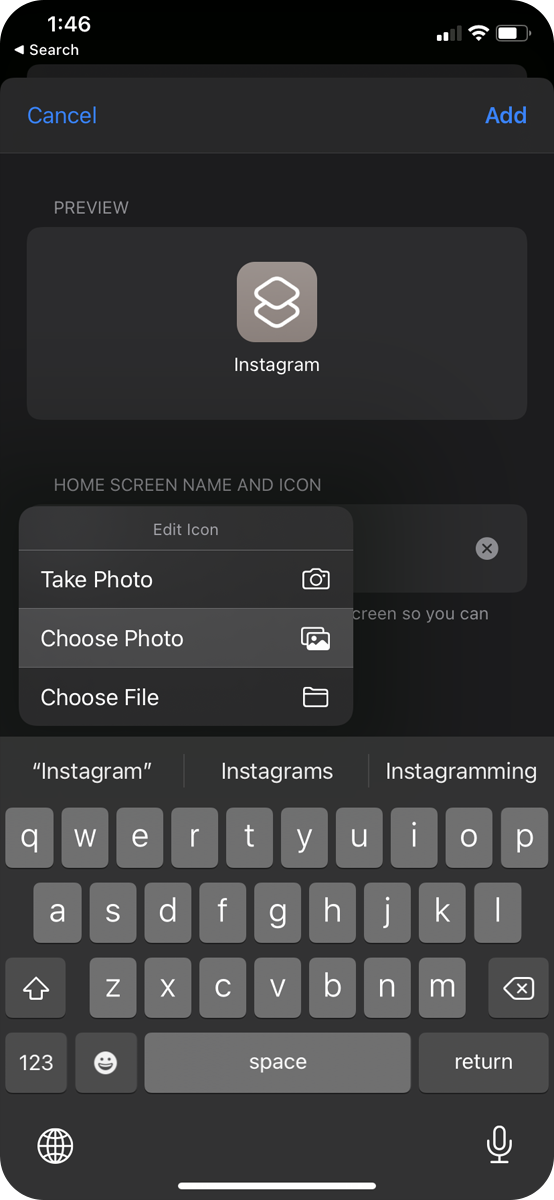
12. Tap the icon button beside the Shortcut Name

13. Tap the "Choose Photo" or "Choose File" option, depending on where you saved the icons
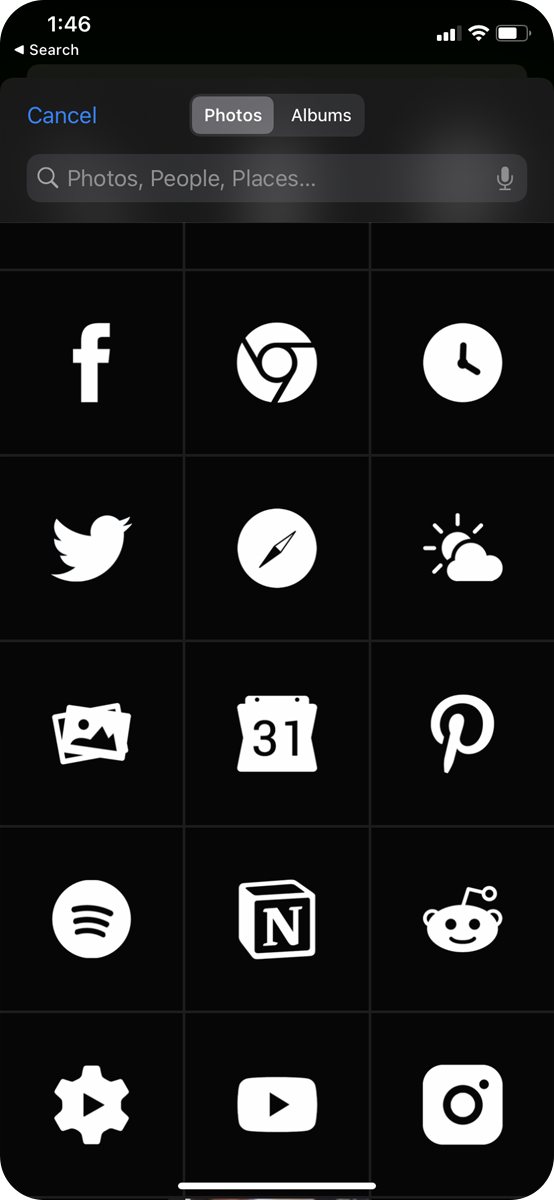
14. Select the icon of your choosing
15. Tap on the "Add" button in the top right corner
16. Tap on the "Done" button in the top right corner
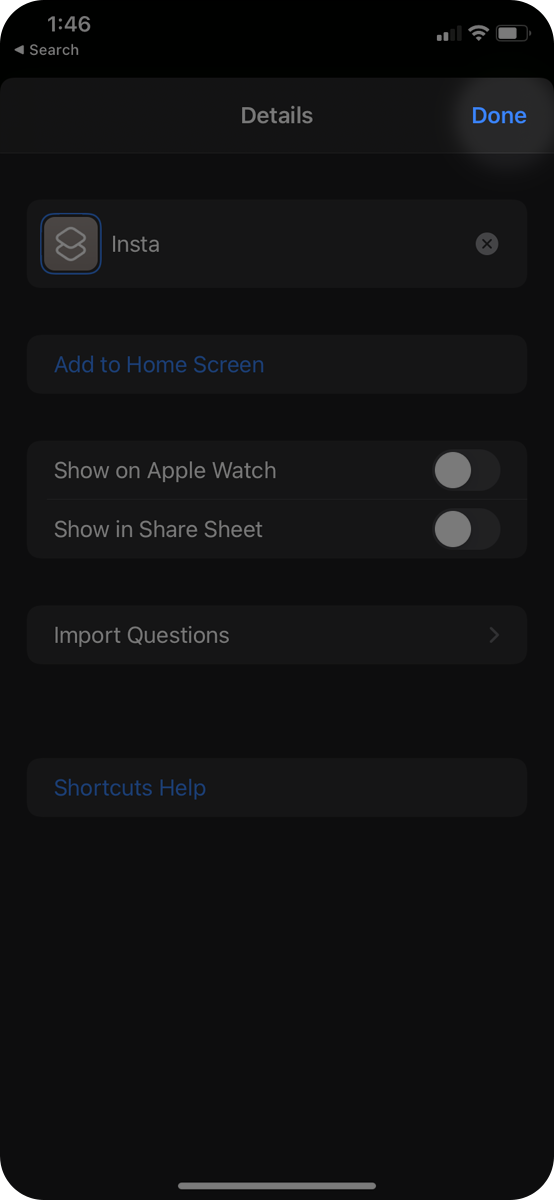
17. Tap on the "Done" button in the top right corner
Instructions
How To Add Custom Icons To iOS 14
1. Open the "Shortcuts" App
2. Tap the "+" icon in the top right corner
3. Tap the "+ Add Action" button
4. Tap on "Scripting"
5. Tap on the "Open App" option
6. Tap on "Choose" to select the app you want to customize
7. Tap on the name of the app you want to customize
8. Tap on the ellipses "..." icon
9. Type a shortcut name (name of the app you want customized will do)
10. Tap the "Add to Home Screen" option
11. Type the name of the app you are customizing in the "Shortcut Name" section. This is how it will be displayed on your home screen
12. Tap the icon button beside the Shortcut Name
13. Tap the "Choose Photo" or "Choose File" option, depending on where you saved the icons
14. Select the icon of your choosing
15. Tap on the "Add" button in the top right corner
16. Tap on the "Done" button in the top right corner
17. Tap on the "Done" button in the top right corner